
Your crawl space shouldn’t feel swampy in spring or bone-dry in winter, but in Northern Utah, seasonal temperature swings create an invisible moisture problem beneath most homes.
You could have a perfectly built home, but without proper moisture management beneath it, you’re asking for trouble—mold, structural decay, energy loss. The problem isn’t always obvious in standing water. More often, it’s moisture vapor silently migrating through your foundation, pooling under your home, then condensing on cool surfaces when temperatures shift.
That’s where vapor barriers come in. But here’s the catch: not all vapor barriers are created equal, and installation mistakes are more common than you’d think. Poor sealing at seams, the wrong product for your foundation type, incomplete coverage—these small oversights defeat the entire purpose.
Read on to understand what’s happening under your home, why Northern Utah’s climate demands serious moisture management, and the steps you can take right now to choose and install vapor barriers that actually work.
Why Northern Utah Homes Face Unique Moisture Challenges
Most people assume Utah’s dry climate means moisture isn’t their problem. That’s usually the first mistake.
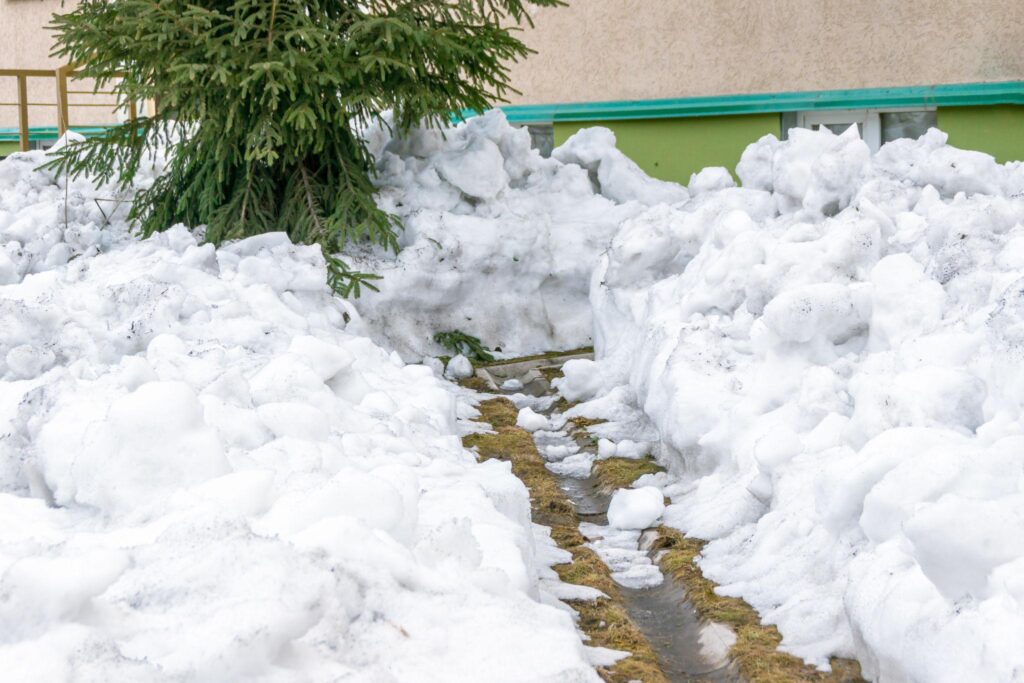
Northern Utah experiences extreme seasonal swings. You get rapid freeze-thaw cycles in spring, heavy snow melt runoff, and dramatic shifts in humidity. Your crawl space feels all of it—it’s the buffer zone between your living space and whatever’s happening outside.
When the temperature drops, warm air in your crawl space cools, causing moisture vapor to condense on cold surfaces such as concrete, ductwork, and joists. Spring snow melt and groundwater move toward your foundation; summer heat pulls moisture from the soil; fall brings new condensation cycles.
Even in a “dry” climate, this cycle creates persistent moisture problems because it’s not about rain. It’s about vapor migration through soil and concrete.
What makes Northern Utah different:
- Spring snow melt — Rapid temperature changes saturate the ground in valley floors and foothills
- Seasonal water table fluctuations — Many Northern Utah properties sit where the water table rises and falls with the seasons, especially after heavy snow years
- Temperature extremes — Winter lows near 0°F and summer highs over 90°F push moisture around in ways that shift year to year
- Low humidity above ground doesn’t prevent moisture from moving downward; it accelerates evaporation from the soil, pulling more moisture upward into your crawl space through capillary action.
Recognizing this, let’s clarify exactly what a vapor barrier is—and, just as importantly, what it is not.
What Is a Vapor Barrier? (And What It Actually Does)
A vapor barrier is a material installed on the ground and sometimes up the walls of your crawl space to block moisture vapor from rising through soil and concrete.
The terminology matters here, though, because confusion is common: a vapor barrier is designed specifically to limit the movement of water vapor—not liquid water. Unlike waterproofing products that stop the flow of liquid water, vapor barriers slow or block only the migration of moisture vapor through soil and concrete. This is a crucial technical distinction to understand.
Vapor vs. Liquid Water:
Vapor moves invisibly through air, porous materials, and cracks in concrete, regardless of whether visible water is present. In contrast, liquid water results from standing water, leaks, or improper drainage, and is immediately visible. These physical behaviors require different solutions. A vapor barrier addresses the migration of invisible water vapor. In contrast, handling liquid water—such as standing puddles or flowing leaks—requires a dedicated drainage system, such as gravel layers, sump pumps, or perimeter drains. Most homes require both systems to manage separate technical issues.
What vapor barriers accomplish:
- Block soil moisture from evaporating into your crawl space.
- Reduce humidity levels to prevent condensation on joists and ductwork.
- Lower the moisture available for mold and dust mites to thrive.
- Reduce the strain on your HVAC system (less dehumidification needed)
- Help prevent wood rot, corrosion, and long-term structural damage.
What they don’t do:
- Stop active water leaks or standing water.
- Replace good grading and drainage.
- Create a perfect seal (installation quality is critical)
- Prevent all condensation (you still need ventilation)
The Two Moisture Problems Under Your Home
Understanding these two distinct issues helps you pick the right solution.
Problem #1: Ground Moisture Vapor
Soil contains moisture. Even if your crawl space looks bone dry, water molecules are constantly evaporating from the soil and moving upward through capillary action. This happens everywhere—it’s physics, not weather.
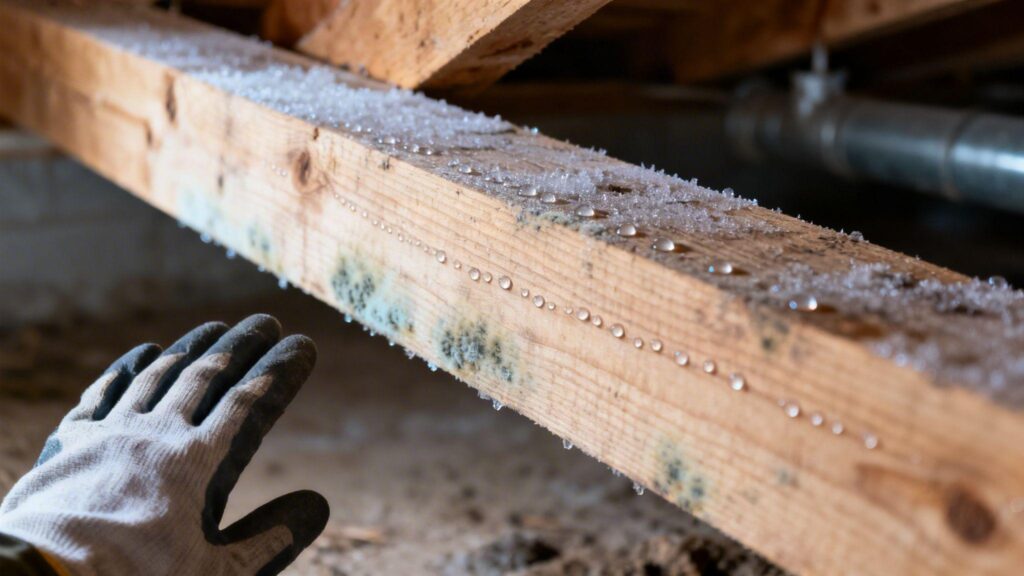
This vapor rises into your crawl space and, when it hits a cold surface like a floor joist or rim band in winter, it condenses into liquid. Over months and years, that accumulation does real damage:
- Mold colonies on wooden framing
- Rust on metal ductwork and support posts
- Rot in wooden beams and subflooring.
- Musty odors that seep into your living space above
- Elevated humidity throughout your whole house
In Northern Utah, winter’s cold joints create heavy condensation, while spring snowmelt saturates soil and summer heat accelerates evaporation. Each season worsens the crawl space moisture problem.
A vapor barrier blocks this at the source by preventing soil moisture from entering your crawl space air in the first place.
Problem #2: Seasonal Temperature Swings
Northern Utah’s dramatic seasonal shifts create moisture patterns that change throughout the year.
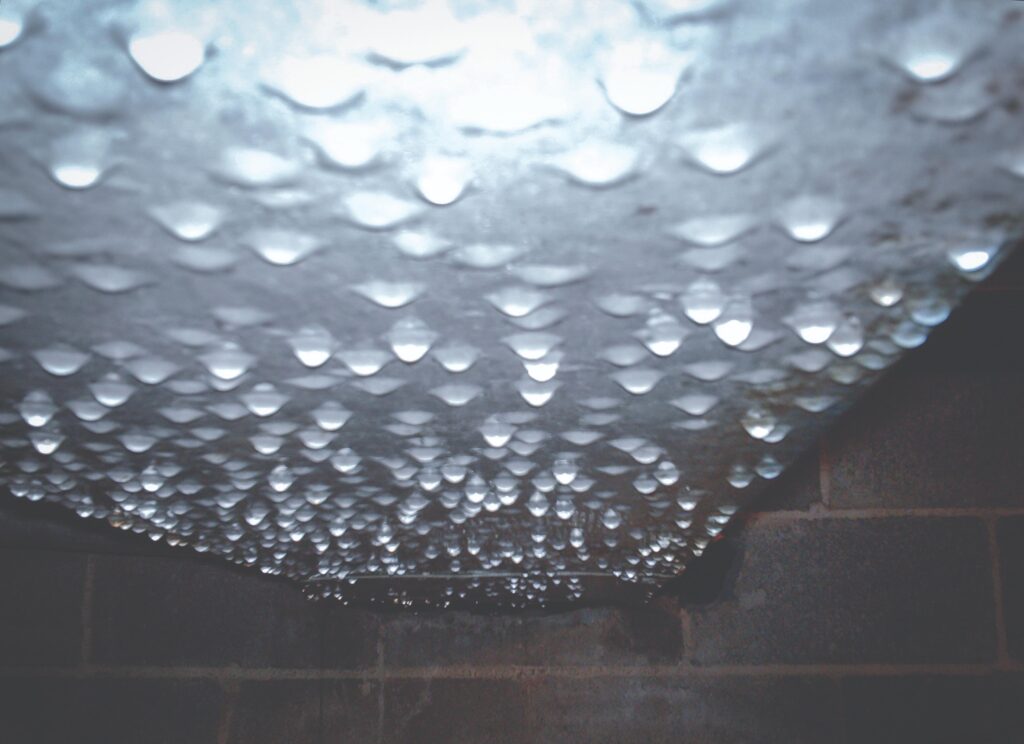
In winter, your crawl space is much colder than in summer. Cold air holds less moisture, so humidity drops. But as outdoor temperatures rise in spring and fall, your crawl space warms gradually. Warmer air can’t hold as much moisture, so condensation forms on cooler surfaces.
Temperature swings also affect how moisture moves through concrete and soil. Freeze-thaw cycles in the soil can crack concrete, creating new pathways for vapor.
Here’s the compounding effect: A vapor barrier helps stabilize humidity levels, which makes temperature swings less damaging in terms of moisture impact. Add proper ventilation and, if needed, a dehumidifier, and you can keep moisture under control year-round.
Without a barrier, your crawl space essentially experiences the outdoor climate directly, just a few degrees later.
Why Poor Installation Defeats Even Good Barriers
A vapor barrier only works if it’s sealed properly. And here’s the reality: poor sealing at seams and edges is the most common failure I see.
Common installation mistakes:
- Unsealed seams—Overlapping sheets with seam gaps let moisture vapor bypass the barrier.
- Gaps at the walls — The barrier doesn’t extend up the rim band or seal against foundation walls. Moisture enters from the sides.
- Punctures and tears — Caused during installation or by sharp gravel and concrete edges. One hole compromises sections of the barrier.
- No sealing around penetrations — Pipes, posts, and ductwork create openings. If they’re not sealed, moisture vapor flows right around them.
- Inadequate overlap — Sheets overlapped by only 6 inches instead of 12. Seams fail under seasonal stress.
- Wrong sealant — Using standard duct tape instead of specialized vapor barrier tape. It deteriorates and loses seal integrity.
- Cracks in concrete not addressed — Active moisture or cracks in concrete should be sealed before barrier installation.
The result: You invest in a barrier that may appear complete but delivers only partial effectiveness. Moisture can still penetrate, condensation persists, and the issue is often attributed to the product rather than the installation process.
Choosing the Right Vapor Barrier for Your Situation
There’s no one-size-fits-all answer in Northern Utah because every home’s situation is different.
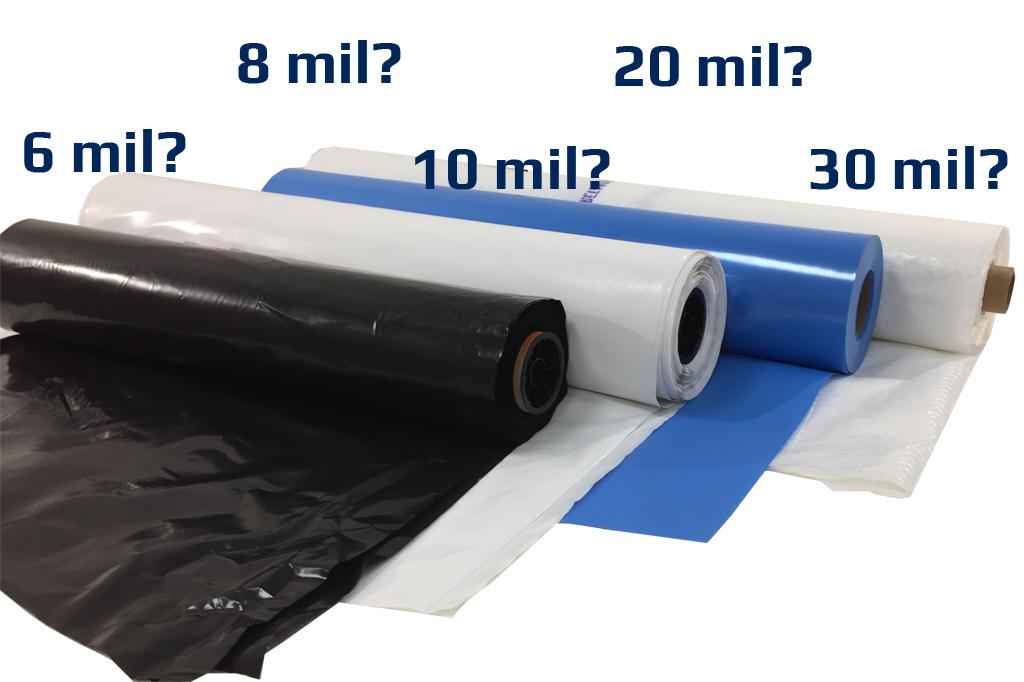
Thickness and Material Options
6 mil polyethylene (Budget option)
Standard plastic sheeting, 6 millimeters thick. Works for temporary solutions or homes with minimal moisture issues. The downside: it tears easily during installation and over time. Not durable enough for crawl spaces with foot traffic or sharp gravel. Not recommended for long-term solutions.
Realistic lifespan: 5-10 years before degradation.
10 mil polyethylene (Most common)
This is a thicker plastic with better puncture resistance. It’s the right choice for most Northern Utah crawl spaces—offering a good balance of cost and durability. Withstands installation stress better than 6 mil. Less likely to tear on gravel or sharp concrete. Standard installation methods work well.
Realistic lifespan: 15-25 years with proper sealing.
20 mil reinforced polyethylene
Extra-thick plastic, often with reinforcement webbing for added strength. Best for high-moisture areas, foundation cracks, active water issues, and homes where durability is a priority. Excellent puncture resistance. Maintains seal integrity over decades. Superior performance in high-humidity crawl spaces.
The tradeoff: higher cost and more difficult installation that requires careful handling.
Realistic lifespan: 25-40+ years with proper maintenance.
Which thickness should you choose?
Start with 10 mil for most Northern Utah crawl spaces. Upgrade to 20 mil if you have visible cracks, high water tables, or foundation damage. The extra cost (often $200-$400 more for a typical crawl space) is worth the durability if you’re dealing with problem areas.
Installation Details That Actually Matter
Where most vapor barrier projects fail is in the execution. Here’s what separates a barrier that works from one that doesn’t.
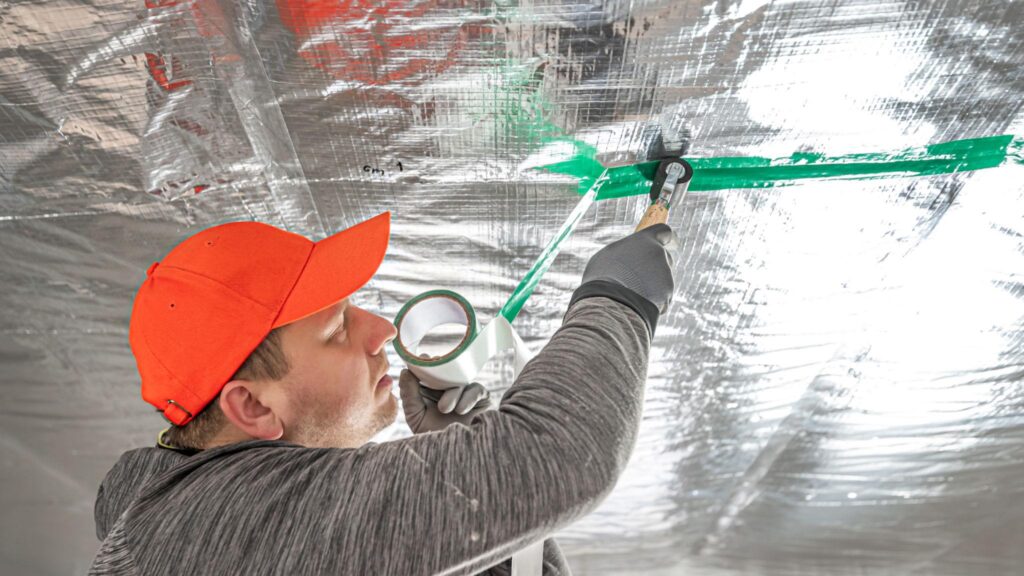
Sealing Seams and Overlaps
Overlapping sheets must be sealed with specialized vapor barrier tape, not duct tape. The overlap itself should be at least 12 inches—not 6. Run tape along the entire seam, pressing firmly to ensure adhesion.
In Northern Utah’s freeze-thaw cycles, poor seams fail within the first winter. Proper sealing prevents vapor from migrating through these weak points.
Wall Coverage
Your barrier shouldn’t stop at the floor. It needs to extend up the foundation walls, particularly around the rim band. The rim band is where most cold surfaces exist in winter, so that’s where condensation happens. Sealing the barrier up the wall and onto the rim band prevents vapor from reaching these problem areas.
At a minimum, the barrier should extend up 2-3 feet on the walls. More is better, especially in high-moisture situations.
Protecting Penetrations
Every pipe, post, and ductwork opening needs to be sealed around it. Cut a small hole in the barrier, fit it snugly, then seal the perimeter with tape. These penetrations are leak points—skipping them defeats the entire purpose.
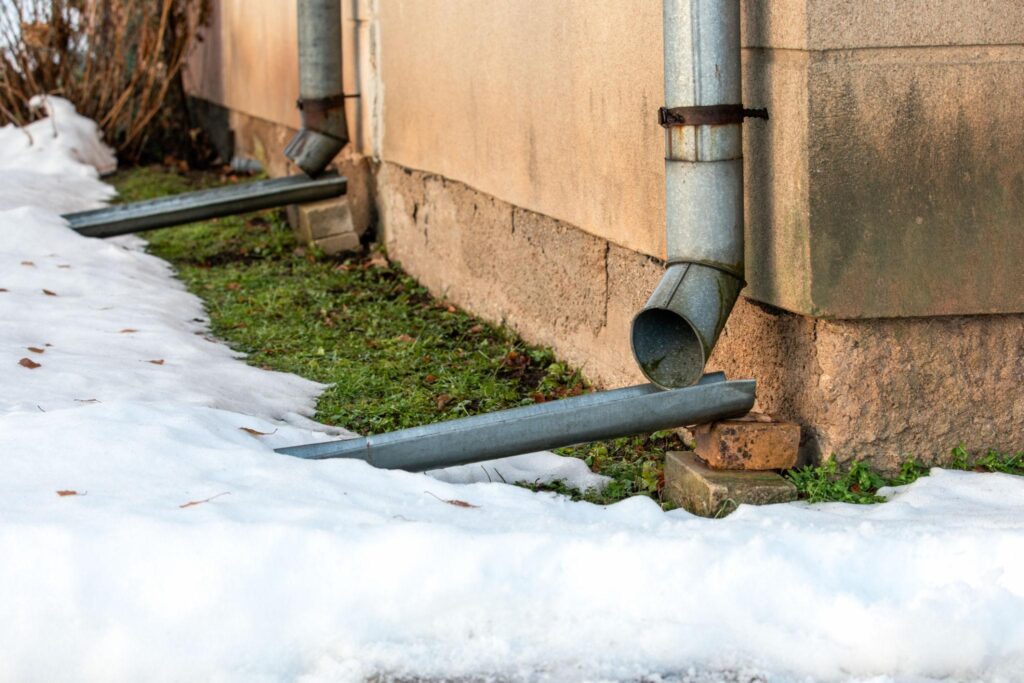
Gravel and Drainage Considerations
If you’re installing gravel in your crawl space for drainage, lay the vapor barrier first, then the gravel. Sharp gravel can puncture plastic sheeting; handle it carefully during installation. Some contractors place landscape fabric over the barrier to protect it from puncture.
Ensure you have a proper drainage path that directs water away from the barrier itself. The barrier stops vapor, not liquid water. If water pools on top of the barrier, you need to fix your drainage system separately.
The Timeline and Seasonal Factors
Spring is the worst time to install a vapor barrier if your crawl space is saturated with snowmelt. You’re fighting active moisture and saturated soil. Wait until early summer when the ground has a chance to dry out somewhat.
Fall is actually ideal. By September, soil moisture is lower, installation is easier, and the barrier is in place before winter’s condensation season hits.
If you can’t wait until fall, summer is your next best option. Avoid spring installation if possible.
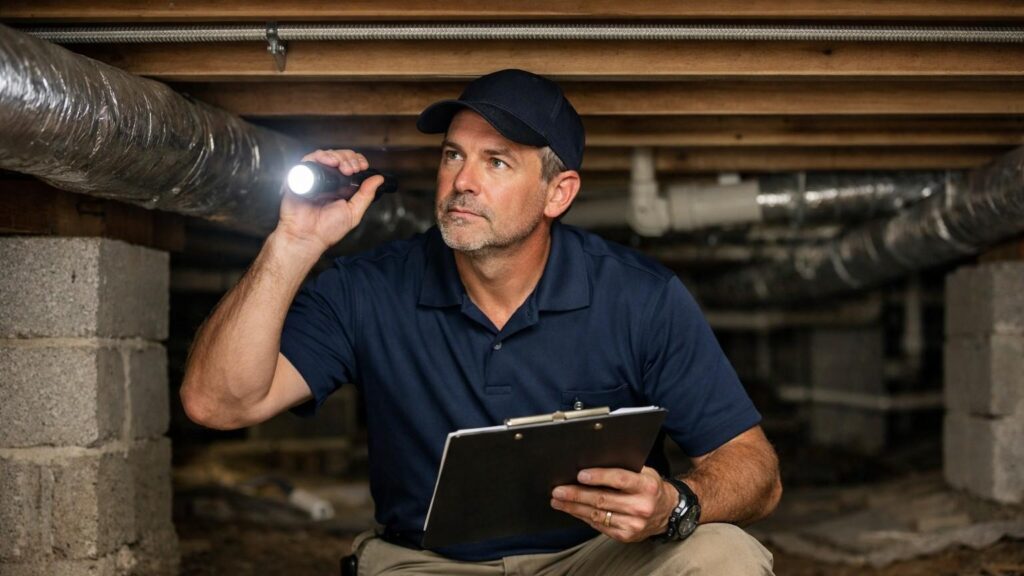
Should You DIY or Hire a Professional?
Here’s the honest take: you can save money doing this yourself if you’re comfortable working in crawl spaces and have the right materials. Many homeowners successfully install 10 mil barriers on their own.
The trouble you run into is the sealing. Professional installers understand how to seal seams, handle penetrations, and manage wall coverage. If the seal isn’t perfect, you’ve wasted material and labor.
If you decide to DIY, invest in quality vapor barrier tape and take your time at the seams. The $100 you might save by using cheaper tape will haunt you when those seams fail in winter.
If you hire someone, don’t just ask about material choice. Ask specifically about sealing methods, overlap size, and how they handle penetrations. Those questions reveal whether they understand what actually makes a barrier work.
How to Know If Your Barrier Is Working
Installation complete doesn’t mean you’re done. Here’s how to verify your barrier is actually performing.
Humidity monitoring:
Get a humidity meter for your crawl space. Before installation, crawl spaces in Northern Utah often have humidity levels of 60-80%, especially seasonally. After proper barrier installation, you should see the humidity consistently drop to 50-65%.
If humidity is still high six months after installation, something went wrong. Common culprits: unsealed seams, unsealed penetrations, or liquid water issues that the barrier can’t address.
Visual inspection:
Check for condensation on joists and ductwork during cool months. You might see some condensation, but it should be minimal compared to before. If you’re still seeing heavy condensation in winter, the barrier isn’t working effectively.
Smell test:
Most musty smells in crawl spaces come from moisture and mold. A properly functioning barrier significantly reduces odors. If your crawl space still smells musty months after installation, it’s a sign that humidity remains high.
The Bottom Line
Your home’s foundation is the one thing you can’t replace. Proper moisture management isn’t fancy or complicated—it’s just about preventing soil vapor from rising into your crawl space and condensing on your framing.
Northern Utah’s climate makes this especially important. Our seasonal swings mean moisture problems can develop and compound quickly. A properly selected and installed vapor barrier stops that problem at the source.
The key isn’t picking the most expensive product. It’s choosing the right thickness for your situation and ensuring installation is done correctly. Sealing matters more than material choice. A well-sealed 10 mil barrier will outperform a poorly sealed 20 mil barrier every time.
If you’re seeing signs of moisture in your crawl space—condensation, musty smells, or just high humidity during seasonal changes—get a professional assessment. It’s the smartest way to understand your specific situation and avoid making decisions based on guesses.